A fire does more than change the lives of everyone it involves. The damage it…

Smoke Damage Cleaning Methods Explained: What Works and What Makes It Worse
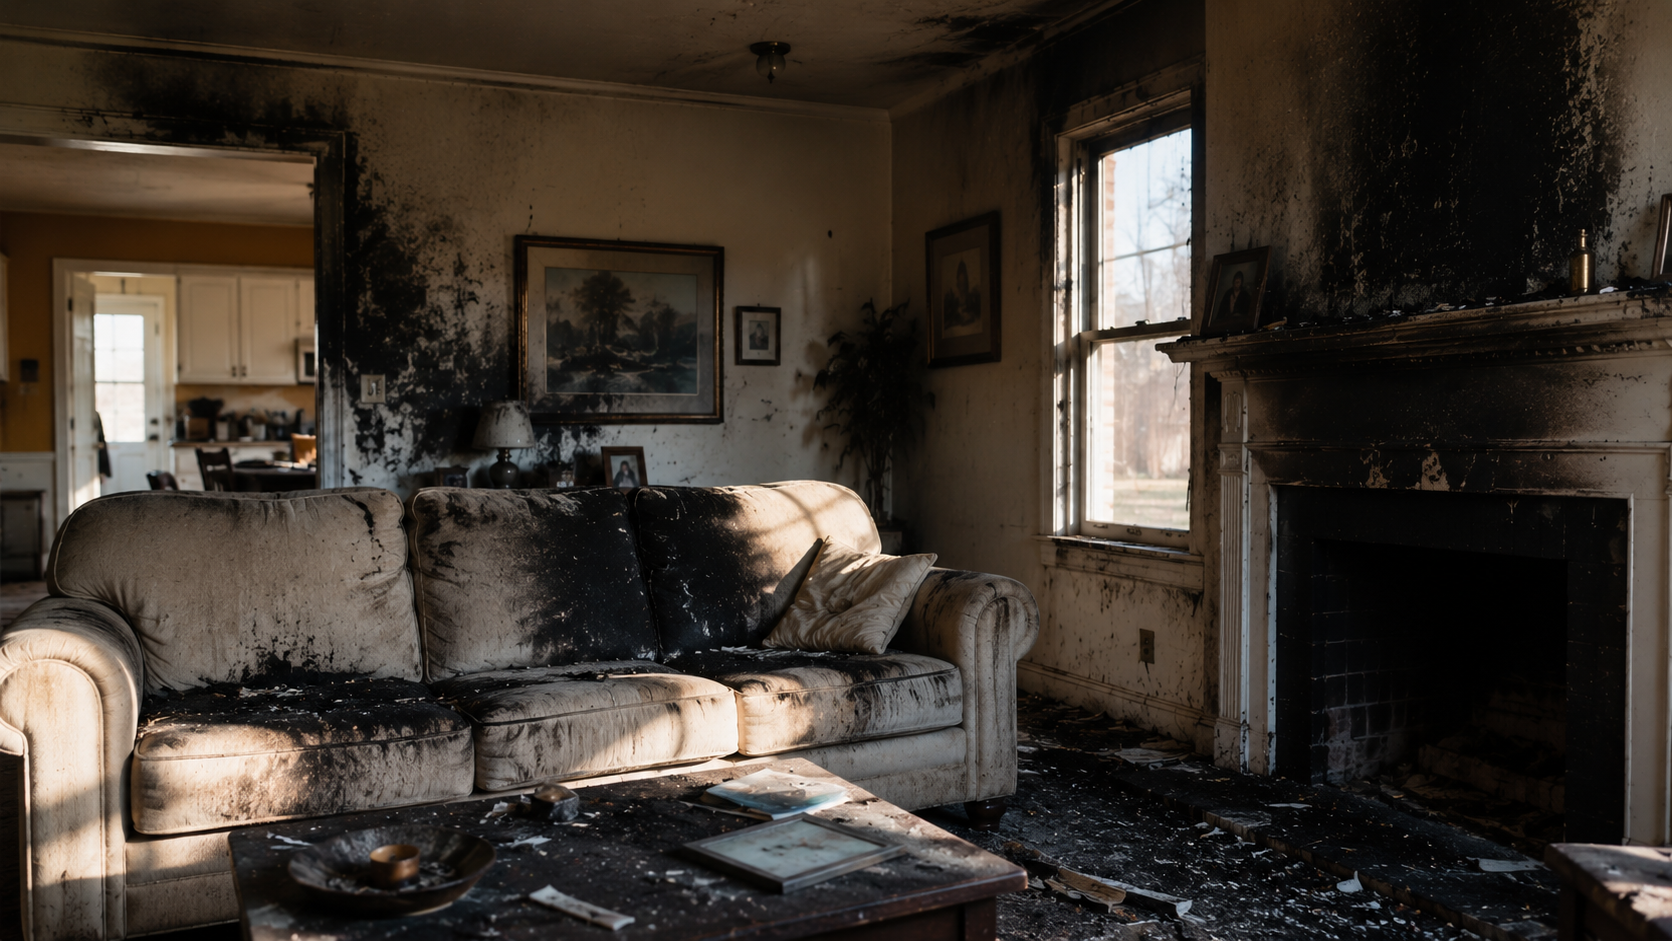
Smoke damage from a house fire isn’t just ugly black streaks on your walls—it’s a sneaky invader that soaks into materials, HVAC systems, and even the air you breathe. Cleaning it properly requires specific techniques to lift soot without smearing it and neutralize odors without masking them. Unfortunately, many homeowners fall for DIY myths that make the problem worse, embedding residues permanently and causing odors to return months later.
Quick Response Restoration uses proven smoke damage cleaning methods that actually work, avoiding the common pitfalls that turn a fixable issue into a long-term nightmare. Here’s a breakdown of what succeeds versus what fails—and why professional intervention is often the only way to fully restore your home.
The Science of Smoke Residue: Why It’s So Stubborn
Smoke contains oily soot particles, acidic gases, and volatile compounds that bond chemically to surfaces. Different fire types produce different residues:
- Dry smoke (wood/paper): Fine, powdery soot that spreads easily.
- Wet smoke (plastics): Sticky, smeary residues hard to lift.
- Protein smoke (food/meat): Invisible but pungent.
- Synthetic smoke (rubber/furniture): Corrosive and oily.
What works: Matching cleaners and tools to residue type.
What makes it worse: Universal “one-size-fits-all” approaches that grind soot deeper.
DIY Mistakes That Permanently Embed Soot and Odors
Homeowners often grab the wrong tools, spreading contamination instead of removing it.
Mistake 1: Wiping with Water or Household Cleaners
Why it fails: Water turns powdery soot into mud that smears into porous surfaces like drywall and wood grain. Oily residues repel soap, leaving films behind.
Result: Permanent stains, trapped odors, and a bigger mess for pros to fix.
Professional method: Dry cleaning sponges and HEPA vacuums first lift loose soot without moisture. Quick Response Restoration follows with pH-specific cleaners (alkaline for acids, solvents for oils) applied dry or minimally wet.
Mistake 2: Using Standard Vacuums
Why it fails: Regular vacuums blow fine soot back into the air through exhaust and lack filters fine enough to capture PM2.5 particles.
Result: Re-contamination of clean areas and soot buildup in your vacuum.
Professional method: Industrial HEPA vacuums (99.97% efficient at 0.3 microns) with specialized soot attachments. These capture particles without redistribution.
Mistake 3: Steam Cleaning Carpets and Upholstery Too Soon
Why it fails: Heat sets protein and oily residues into fibers, making extraction impossible later.
Result: Permanent odors and discoloration.
Professional method: Pre-testing, then dry or low-moisture extraction, followed by enzyme treatments for proteins. Ozone chambers for deep fabric deodorization.
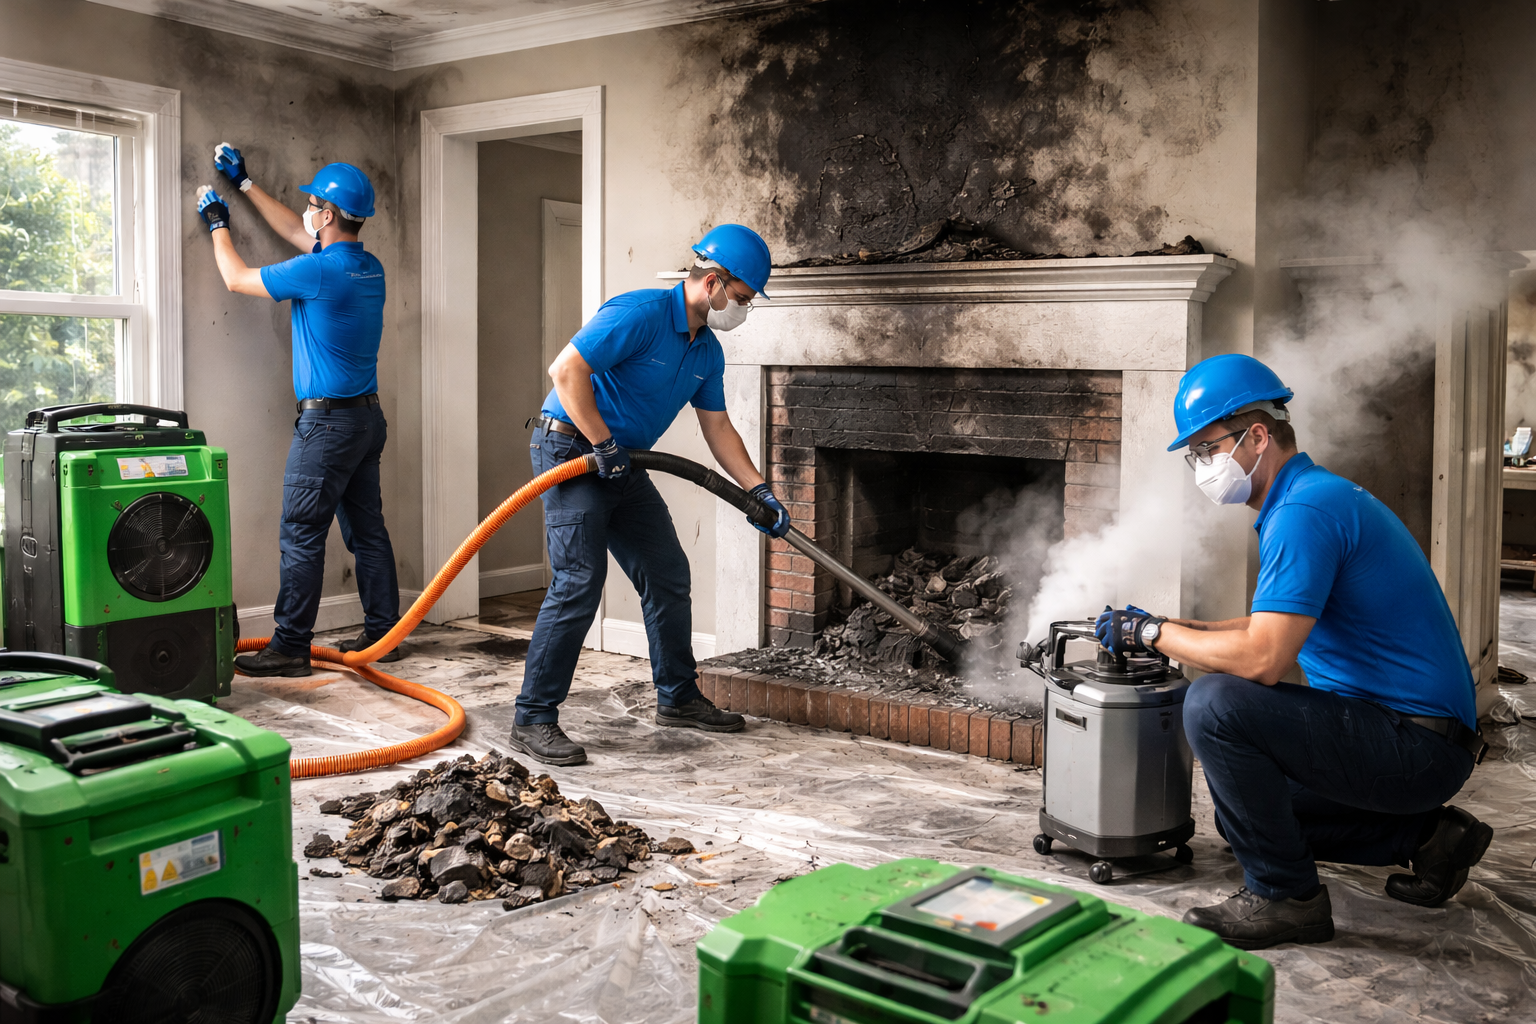
Professional Smoke Damage Cleaning: Methods That Actually Work
Certified teams follow a layered approach tailored to your fire’s specifics.
Phase 1: Gross Soot Removal (Dry Methods)
- HEPA vacuuming: Removes 90% of loose particles safely.
- Dry sponges: Lift soot from walls/ceilings via abrasion without residue spread.
- Chemical sponges: For stubborn grease films.
Quick Response Restoration prioritizes dry removal to prevent smearing before wet cleaning.
Phase 2: Surface-Specific Wet Cleaning
| Surface Type | Professional Cleaner | Why It Works |
| Painted Drywall | TSP or smoke-specific foam | Cuts grease without damage |
| Raw Wood | Solvent-based strippers | Penetrates grain |
| Metal/Glass | Acidic cleaners | Neutralizes corrosion |
| Stone/Brick | Poultices | Draws out embedded soot |
Phase 3: HVAC and Hidden Area Cleaning
Ducts, attics, and crawlspaces get rotary brushes, negative air machines, and fogging—areas DIY can’t reach.
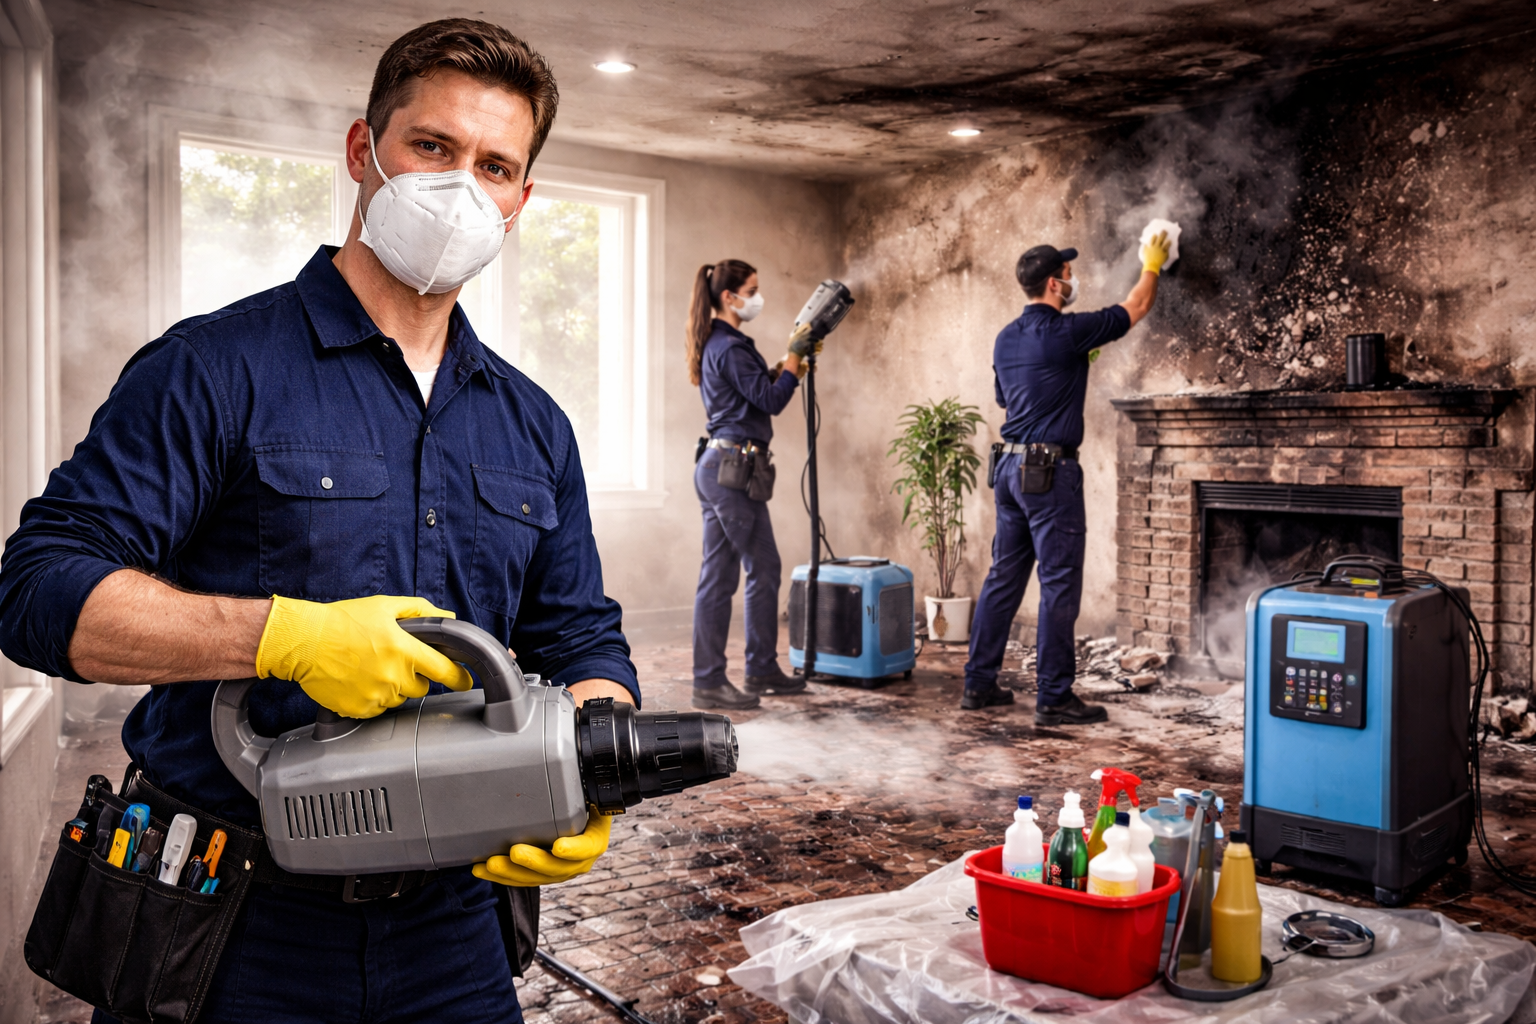
Odor Neutralization: Beyond Air Fresheners
Odors persist because smoke molecules bond chemically. Masking fails.
What doesn’t work:
- Sprays/candles (temporary cover-up).
- Baking soda (surface absorption only).
What works:
- Thermal fogging: Fine particulate follows smoke paths, chemically neutralizing residues.
- Ozone generators: Breaks VOC bonds (used unoccupied).
- Hydroxyl generators: Safe, continuous odor destruction.
Quick Response Restoration combines fogging with source removal for permanent elimination.
Air Quality Restoration: Protecting Your Health
Smoke cleaning isn’t cosmetic—it’s health protection.
Professional air scrubbing:
- HEPA units capture soot, mold spores from firefighting water.
- Improves IAQ to pre-fire levels.
Health wins: Reduced asthma triggers, allergies, and respiratory irritation.
Comparison: DIY vs. Professional Results
| Aspect | DIY Outcome | Professional Outcome |
| Soot Removal | Smeared stains, residue remains | 99% particle capture |
| Odor Control | Returns in weeks | Permanent neutralization |
| HVAC | Re-contaminates rooms | Full duct decontamination |
| Cost Long-Term | Repeat treatments | One-time complete fix |
| Health/Safety | Ongoing exposure | Verified clean air |
When DIY Might Be Okay (Rarely)
Tiny, contained grease splatter on glass/metal: mild soap + HEPA vac. Anything else? Call pros.
Signs you need Quick Response Restoration:
- Odors linger after cleaning.
- Yellowing returns on walls.
- HVAC blows smoky air.
Final Steps After Smoke Damage Cleaning
- Seal cleaned surfaces with odor-blocking primer.
- Replace HVAC filters.
- Monitor air quality.
Smoke damage cleaning done right prevents callbacks. Quick Response Restoration delivers methods that work—without the worsening mistakes. Contact them to end the smoke cycle for good.

Robert Serafini serves as Quick Response Restoration’s cornerstone of Experience, Expertise, Authority, and Trust (EEAT). A dedicated member of the Quick Response team since 1998, Robert brings decades of hands-on restoration and insurance industry knowledge to every project. Prior to joining QR, he worked as an independent insurance adjuster, giving him a deep understanding of claims processes, policy interpretation, and customer advocacy.
Robert holds multiple IICRC certifications for fire, water, mold and has successfully managed numerous multi-million-dollar restoration projects, including large-loss and complex commercial assignments. His portfolio also extends internationally, where he has contributed to remediation efforts abroad.
Deeply rooted in the Capital District community, Robert is known for his generosity and civic involvement. He actively hosts and supports charity events benefiting local hospitals, schools, first responders, veterans, Catholic organizations, pet adoption, and local Chambers of Commerce. He is also an engaged member of several professional associations: Saratoga County Chamber, Adirondack Regional Chamber, NYS SFA Chapter, GCAR, ENYSHE and BOMA continuing to elevate industry standards and strengthen community ties.
Related Posts